MyCalyx User Roles
Specifying and Changing User Roles
To add or change a user role:
- Go to the MyCalyx® home page.
- Click Manage Point® Installations to access the Manage Point Installations page.
- Double-click the user record to enable edit mode.
- Select the check box that corresponds to the role or roles to assign to the user.
 Administrator icon
 Purchaser icon
 End user icon
Attention: The purchasing process is not implemented in MyCalyx for this release.
Therefore, the Purchaser role option is not enabled on the Manage Point Installations page at this time.
- Unselect check boxes to rescind user roles.
- Click the Save icon to save the record with the changes.
Note: For details about setting up the PointCentral server, refer to the PointCentral User Guide.
Rescinding End-User Status and Uninstalling Point
To rescind an end user role from a user and make the license available to another user:
- Go to the MyCalyx home page.
- Click Manage Point Installations to access the Manage Point Installations page.
- Double-click anywhere in the user row to enable edit mode.
- Uncheck the end user check box for the subject user.
Or, alternatively, select the leading check box next to the users you want to revoke their end user role and click the Remove End User Role button. Users with only end user roles are removed from the user list. Users with other roles remain on the user list.
- Click the Save icon (
 ) to save the user.
– A confirmation message is displayed. The license is now available for another user.
- On the end user's computer, click the icon that is used to open Point.
– The uninstall process is initiated.
- To remove the Point icon from the desktop when the uninstall process is complete, right click the icon and select delete.
Tip: The Total Installations on the Manage Point Installations Summary page is updated to reflect the reduced number of licenses.
The Seats Installed on the Manager Users Summary page is updated to reflect the reduced number of seats.
Deleting Users
To delete a user from MyCalyx:
- Go to the MyCalyx home page.
- Click Manage Point Installations to access the Manage Point Installations page.
- Select the leading check box next to the user records that you want to delete.
– The Delete button becomes enabled.
- Click Delete.
- Click OK in response to the confirmation prompt.
– The selected users are removed from the user list and the license status changes to white.
- Click Cancel to return to the Manage Point Installations page without deleting the user.
Note: If the deleted user is assigned an End User role, the Point installation is removed from their computer and they are no longer able to use Point.
Locating User Records (Using Filters)
Use the filter function to find specific records when you have a large number of users. In a smaller organization, you can sort the list by clicking the column header to manually search for a record.
To use the filter function to locate a record or group of records:
Tip: Filtering records is useful to locate user records in an organization with a large number of users.
- Go to the MyCalyx home page.
- Click Manage Point Installations to access the Manage Point Installations page.
- Enter the search criteria in the Filter field.
- Click Search.
– The user list is refreshed based on the filter information.
- To further refine the search parameters, enter another level of search criteria in the Filter field and click Search.
- Continue to enter search criteria until the user list contains the records you need.
– Click Clear Filter to clear the Filter field and restore the entire user list.
– The Joe Johnson with the specified e-mail address is displayed in the list.
Example: To search for a specific user, for example, Joe Johnson:
- Enter Joe Johnson in the Filter field.
- Click Search.
Every user with Joe Johnson in their user record is displayed.
- To filter the list by a specific Joe Johnson, enter his e-mail address (his MyCalyx username) in the Filter field.
in the Filter field.
- Click Search.
Tip: To locate a specific user who has a common name, perform the initial search on the user's e-mail address or other user-specific identifying information, if known, in the first search. The results will return only the record you are seeking.
Creating Installation Settings
Use the Installation Settings page to create installation groups that contain preset installation parameters. When an End User installation is performed and they are assigned an installation setting, whether it is for a new license or a software update, the installation is completed per the settings in their assigned installation group. If the user is not assigned an installation setting, the default Point installation is used.
Note: Using installation settings is optional.
The default Point installation in a non-server environment creates the default template and data folders and includes Point Administrator.
To create an installation group:
- Go to the MyCalyx home page.
- Click Manage Point Installations to access the Manage Point Installations page.
- Click Installation Settings.
– The Installation Settings page is displayed.
- To create a new setting, select Create New Settings from the dropdown list.
– To edit an existing installation setting, select the installation setting name from the dropdown list.
- Enter a name for the installation group in the Name field.
Note: The Name field is the only required field. All other fields are optional.
- Select the Terminal Services Installation check box if your site has a terminal services installation setting.
– The Template Directory Path is the template location where the end user is authorized to access Point templates.
– If the Template Directory Path is left blank, the existing setting on the local client is preserved and is not overwritten.
Note: If your site runs PointCentral, the template directory and data folder paths and their user access rights are specified in the PointCentral settings. Therefore, it is unnecessary to complete these fields.
- Specify the template directory location in the Templates Directory Path field.
– The Template Directory Path is the template location where the end user is authorized to access Point templates.
– If the Templates Directory Path is left blank, the existing setting on the local client is preserved and is not overwritten.
Note: If your site runs PointCentral, the template directory and data folder paths and their user access rights are specified in the PointCentral settings. Therefore, it is unnecessary to complete these fields.
- Enter data folder locations in the Data Folder Path field that the end users who are assigned to the installation group are authorized to access.
Click the Add button to add the data folder to the Data Folder Path list.
If the Data Folder Path is left blank, the existing setting on the local client is preserved and is not overwritten.
- Repeat to add additional data folders.
Restriction: The maximum number of data folder paths allowed is 10,000.
– To delete a data folder path from the list, select the path and click the Remove button.
– To move a data folder path up or down in the list, use the Move Up and Move Down buttons.
– The sequence of the data folders in this list determines the sequence of the folders in the data folder dropdown lists in Point.
Tip: You can select multiple folder paths by holding the control key when you select each folder and delete them or move them up or down.
Example: A company (that does not use PointCentral) that uses multiple data folders with different user access levels would create installation groups for each level and assign users to each group accordingly. You can assign a data folder to more than one installation group.
- Select the Install Point Administrator check box to include Point Administrator in the installation. Point Administrator is not used if PointCentral is enabled. Do not select this check box if you run PointCentral.
- Select the Enable PointCentral check box if you use PointCentral as your file server.
If PointCentral is enabled, the data folder and template directory paths are specified in the PointCentral settings. Point Administrator is not used.
- To enable Point to automatically install on your network if a Windows administrative password is required, enter the username and password of your Windows Administrator.
- Specify the location on your sever to store the Point installer in the Installation Package Cached Location section.
This setting specifies where the Point installation package is downloaded when the first installation is initiated. All subsequent installations retrieve the installer from this location.
Note: When the account has many users at the same location, it is more efficient to download a new version to a single cache location. As each user updates, MyCalyx will deliver the new version more rapidly, with less intranet traffic if it is from your local server.
- Click Save to save the settings.
Important:
– If you navigate to another installation setting or to the Manage Point Installations page without saving changes to the current installation setting,
your changes are not saved and are lost.
– Click the Delete button to remove the current installation group.
– If any users are assigned to an installation group, they must be removed or assigned to a different group before you can complete the deletion.
– Click the Manage Point Installations button to return to the Manage Point Installations page.
Advanced Installations
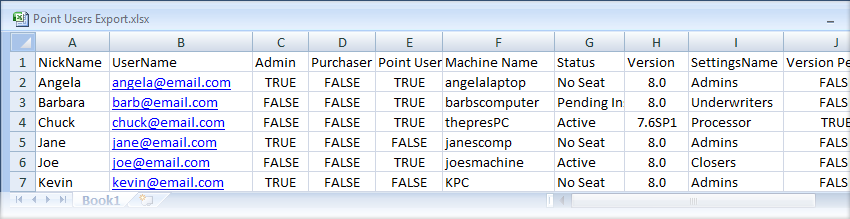
Existing users who performed advanced installations prior to using MyCalyx will find that the settings in the Installation Settings dialog box are the same as the settings in the Network Configuration Server dialog box. Therefore, Point Administrators and PointCentral users who previously set up their networks by using the Network Configuration Server can use the settings that correspond to the fields in the Network Configuration Server dialog box as shown in the following figure.
Resending the Installation Email to End Users
To resend the installation e-mail:
- Go to the MyCalyx home page.
- Click Manage Point Installations to access the Manage Point Installations page.
- Select the check boxes next to the users the users that need to install Point.
- Click Resend Email.
The e-mail that contains instructions and the installation link for Point users is sent to the selected users.
Passwords
To change your password:
- From any page in MyCalyx, click the MyProfile link at the top of the page.
The Profile page is displayed.
- Enter your new password in the Password field.
Requirement: Your MyCalyx password must contain a minimum of six characters, at least one uppercase or lowercase letter, and at least one number.
In addition to alphabetic and numeric characters, the following characters are allowed: comma, apostrophe, period, hyphen, !, @, #, $, %, ^, &, *, (, ), |, ?, /, ~.
- Confirm your new password by entering it in the Re-Enter Password field.
- Click Save.
To reset your password:
- Click the Forgot Your Password? link on the MyCalyx logon page.
The Password Retrieval page is displayed.
- Enter your e-mail address and click Submit.
An e-mail is sent to the e-mail address on record.
- Open the e-mail and click the link as instructed.
The Change Password page is displayed.
Important: The link expires 120 hours after the e-mail is generated.
If you do not re-set your password within the 120-hour period, click the Forgot Your Password? link and repeat the process.
- Enter your password in the required fields and click Save.
The Home page is displayed.
Increasing and Decreasing Calyx License Count
Contact Calyx Sales to add more licenses to your account.
- The customer order for new licenses is processed upon receipt of payment. Licenses are available on MyCalyx after the ordering process is complete. Processing the order is completed within 24 hours.
- When license count is reduced, the license reduction is shown on the Manage Point Installations summary within the hour. If the license reduction falls below the number of current Point installations, Administrator functions are limited until enough licenses are purchased or until Point is removed from enough computers.
End User Point Installation
When an end user is assigned a Point license, they will receive an e-mail notification that contains a link and instructions for installing Point.
When the user clicks the link in their e-mail, the Point installation is launched and begins immediately.
The installation is completed per the settings in the installation group that is assigned to the end user.
If an installation group is not specified, Point Administrator is installed and the default template and data folders are created.
Note: For details about the Point installation process, refer to the Point User Guide.
From initial application through trailing documents – including secondary marketing, Calyx® has you covered.
Call 800-362-2599 for pricing options or to schedule a live demonstration.











 MyCalyx Overview